|
Keep your web apps up to date and close the door on hackers Anytime you add an application to your website, such as a store, blog, bulletin board, email form, or any other dynamic page or web application, you could be adding functionality that a hacker can use to gain access to your data, and possibly do damage. MacHighway recommends that you frequently check for updates and use only trusted and well scripted applications, like the ones offered through MacHighway.. For detailed information on choosing a suitable script and checking for updates, please review our knowledgebase article here. |
| Installation: | |
| Ease of Use: | |
| Technical Support: | http://www.zen-cart.com/ |
1. Login to the cPanel for your hosting package, commonly found at http://www.yourdomainname.com/cpanel (yourdomainname.com should be replaced with your actual domain name)
2. Go to the Softaculous icon. 
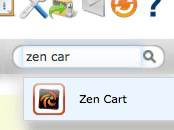
3. Enter Zen Cart in the top right search box. When the full name appears below your search, click on it.

4. You will see a description of Zen Cart. Click the Install link at the top of the page.
5. On the resulting page you will have a lot of options as to where and how you want Zen Cart installed. Allow me to help you with the options on this page, won't you?:
Choose Protocol: Select http://www.
Choose Domain: Select the domain name you want Zen Cart installed in.
In Directory: If you want this installed in your main directory (http://www.mydomain.com) then leave this blank. If you want it installed in a sub-directory (like http://www.mydomain.com/blog) then enter that sub-domain (blog) in this field.
Database Name: Leave this field alone.
Store Name: Enter the name of your store.
Store Owner: Enter the name of the store owner. Is it you? That must be a pretty sweet gig.
Store Address: Enter the physical location of your store.
Table Prefix: Leave this field alone.
Admin Username: Change this. Do not use Admin as the username, as it's a frequent target for hackers. Why not use your first name?
Admin Password: Leave this as is. Copy and paste it into some place safe.
Admin Email: Enter a good contact email address for yourself. One that already exists.
Scroll to the bottom of the page to Email installation details to : and enter a good email address where the installation details (including the password) can be sent to.
6. Click the Install button.
Congratulations. You have installed Zen Cart on to your site.
Did this work for you? If not, let us know what trouble you had in the MacHighway Forums.

