Now that you know the basics on how to build your new site using the MacHighway Website Builder, let us take a look as some of the more advanced addons and elements that you can use to take your website to the next level.
Sections
- Accessing your MacHighway Website Builder
- Add-ons
- Slideshows
- Contact Form
- Google Maps
- YouTube Videos
- Other Elements
Accessing your MacHighway Website Builder
If you do not known how to purchase the MacHighway Website Builder or access the service, you can check the guides below to get you started.
Purchasing the MacHighway Website Builder
Accessing your MacHighway Website Builder
Back to Top
Add-Ons
The most commonly used Add-Ons should be active by default. However, there are some Add-ons that you will need to activate before then can be added to your site. If you do not see the Add-On in your My Add-Ons menu, it will need to be activated first.
Click on the + Add-Ons button in the left-hand menu to see what Add-Ons are available. When you mouse-over any of the Add-Ons, you will see a Learn More button. Clicking on this button will bring up the Add-On page. On this page you will see a description of the Add-On, as welll as a button to Activate it. Click this button to add it to your My Add-Ons menu.
Note: You will see that some of these Add-Ons are labeled as Free. At one point, these additional Add-Ons would have needed to be purchased to add to your site. This is no longer the case and all are free to use.
Google Maps
You can add a Google Map to your website that shows your customers your current physical address, so they can easily add your location to their contacts and find your store.
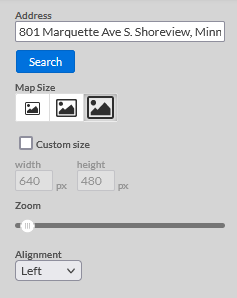
In the right-hand menu options, enter your business location in the top field and click the Search button. Once found, the map will be centered on your location.
You can also customize the look of your Add-On in this menu. Choose between three preset sizes or enter your own custom size, set the zoom level and alignment.
Back to Top
Slideshows
You can add a slideshow to your site using the slideshow element, found in the Elements menu, under the Gallery category. Drag the element from the menu to your site.
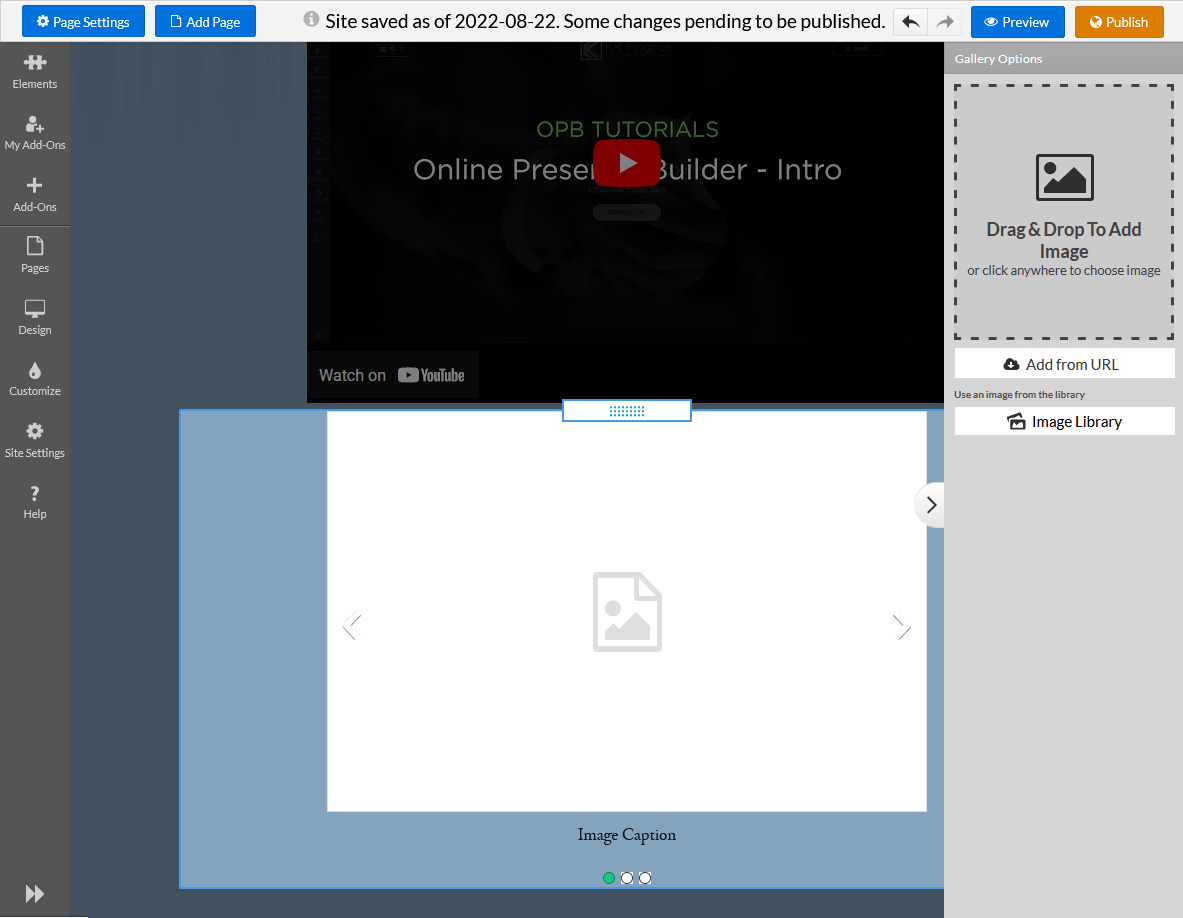
Once you add the slideshow to your page, you will see the options on the right-hand menu. Here is where you add images to your slideshow. You can drop them onto the block in the menu, or you can browse your computer for your pictures by clicking on the drop area. Or, you can choose from any pictures that are in you Image Library.
Once you have added your pictures, you can now customize the slider using the Settings tab in the options menu. There are several sections of options that you can use to customize your slideshow.
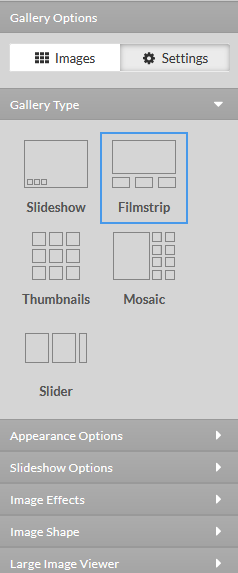
- Gallery type
- choose the layout and style of your slideshow
- Appearance Options
- modify the size of the slideshow, as well as the thumbnails, if current Gallery tyoe uses them
- show the next and previous buttons
- show the scrollbar
- thumbnail placement (left, right, above or below)
- show captions
- crop image
- crop icon
- Slideshow Options
- Display time - delay before loading the next image
- Autoplay - cycle through the images
- Show Play/Pause - show the Play and Pause buttons
- Loop - repeat from start once all images were displayed
- Transition - choose the transition between images
- Image Effects
- choose between several image effects
- Image Shape
- you can set the shape of your slideshow here
- Large Image Viewer
- here you can set alternate options for large, full screen images
You can play with these options as much as you like, until you find what is right for your site. It will not be updated on your live site until you publish the page, so feel free to experiment.
Back to Top
YouTube Videos
If you already have your videos uploaded to YouTube, you can embed your videos in your website without needing to upload them here. You will need to activate this Add-On. Once activated, you can find the YouTube Add-On in your My Add-Ons menu.
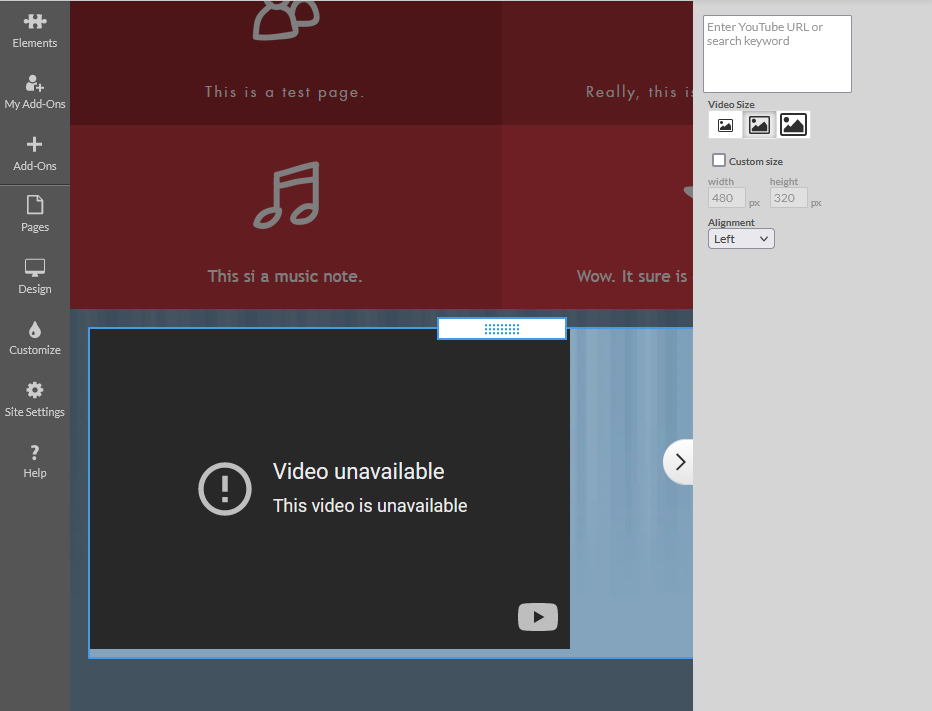
Once you add the YouTube element to your site, you will see the options in the right-hand menu.
In the top field, you will need to enter the link to your YouTube video. You can get this by going to the video on the YouTube platform and copying the URL link in your browsers address bar.
![]()
You can search for your video using the Search button, but it will be quicker to copy the URL.
You can also choose the size of the embedded element, as well as the alignment.
Back to Top
Other Elements
There are several other elements that you can add to your site that are included with your MacHighway Website Builder.
Open Hours
Use this element to create a chart of your hours of operation.
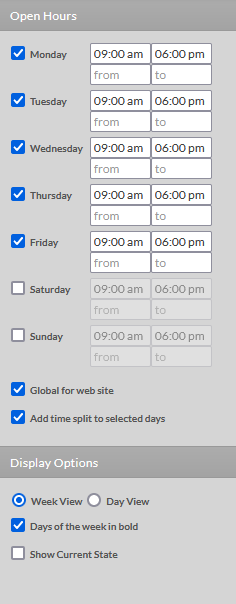
In the options you can set your hours for each day and whether to show the whole week, or only the current day. You can also add split days if, for example, you are closed for noon. The Show Current State is a nice touch.
Contact Info
This element will allow you to add your contact information as well as all of your social media links. You can add your Open Hours information from that element as well.
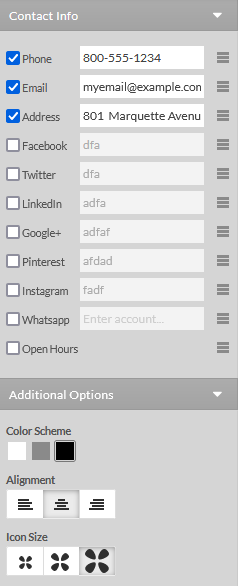
If you have many links selected, you will only see the icons. If you wish to show your email and physical address, you can create two elements, one for the addresses, and one for links.
Cookie Disclaimer
This element is added to the entire page, you do not need to drag it onto your page. This will allow you to customize the "Cookie" message that is displayed when anyone first visits your website. To customize your Cookie Disclaimer, you only need to click on the gear icon in the My Addons section.
News and Events
With this element, you can add an RSS feed to your website, or you can create your own event list.
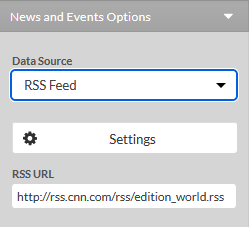
If you wish to display an RSS feed, select RSS Feed from the Data Source drop down menu and enter the address in the RSS URL field. You can customize the feed in the Settings section.
Settings:
- Display Preferences
- Show the First
- choose how many articles to display
- Truncate Description After
- select how many characters to display
- Sort by Date
- sort from oldest to newest or newest to oldest
- Show the First
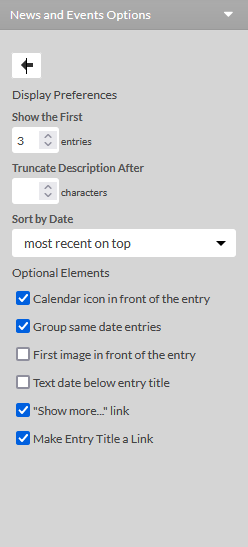
- Optional Elements (these are self explanatory, choose what options you would like to use)
- Calendar icon in front of the entry
- Group same date entries
- First image in front of the entry
- Text date below entry title
- "Show more..." link
- Make Entry Title a Link
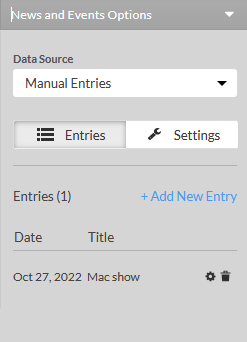
If you would like to display events that you created yourself, you can choose "Manual Entries" from the Data Source field. Here, you can create your own event list to be displayed on your website. You can toggle between the Entries and Settings.
Entries: In this menu, you will find the + Add New Entry button, as well as a list of all of your previously entered events. Hovering over any entry will show the options to either edit the entry or delete it.
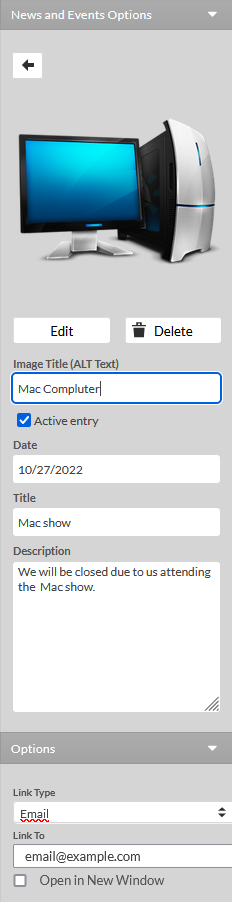
After clicking the + Add New Entry button, you will be able to start creating your event.
You can add an image to the event by dragging the image to the field at the top of the menu, or you can browse your computer or gallery for an image. Be sure to enter a title for your image.
Next, there is a checkbox for whether the event is active or not. Also, you can enter the Date, Title and a Description.
Finally, you can choose what the event will link to, if anything. You can link it to a website page, internal or external. Or, you can enter an email address or phone number link.
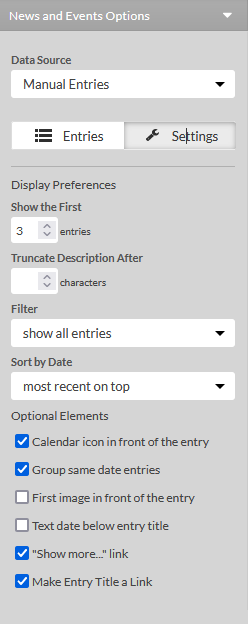
Settings: Clicking on the Settings option will open the Settings menu. Here, you will be able to customize your News Feed.
- Display Preferences
- Show the First
- choose how many articles to display
- Truncate Description After
- select how many characters to display
- Filter
- choose what events to display
- show all entries
- show only past entries
- show only future entries
- choose what events to display
- Sort by Date
- sort from oldest to newest or newest to oldest
- Show the First
- Optional Elements (these are self explanatory, choose what options you would like to use)
- Calendar icon in front of the entry
- Group same date entries
- First image in front of the entry
- Text date below entry title
- "Show more..." link
- Make Entry Title a Link
Back to Top
Still Having Issues?
If you are still having issues, you can contact our Customer Support in the following methods:
Live Chat
You can connect to our Live Chat Support Team from your MacHighway Client Area. If you are not sure how to do this, you can find a guide here.
Our Live Chat team is available Monday to Friday from 9:00 AM to 7:00 PM Eastern Time.
Support Ticket
You can submit a support ticket to our Support Team from your client area.
Our ticket Support Team is available 24/7/365.
Phone support
You can contact our Phone Support Team using the following number:
- US/Canada 1-888-974-0334
- International 1-727-800-3606
Our Phone Support team is available Monday to Friday from 9:00 AM to 7:00 PM Eastern Time.
